The AC2 installation guide will have the following information:
Components of the controller (1-15):
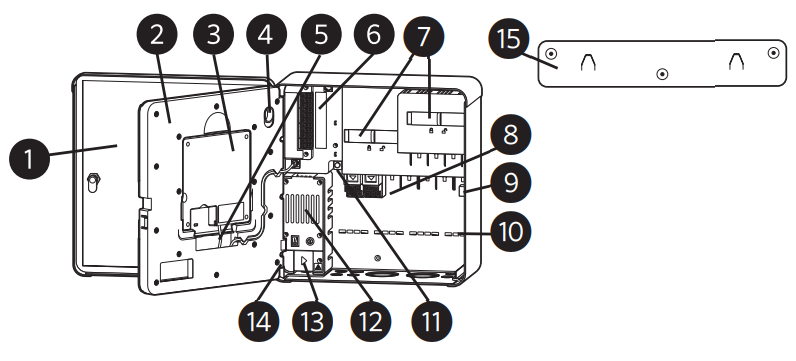
- Front Door
- Face Frame
- Facepack
- Face Frame Latch
- Facepack Cable (892700)
- Power Supply Board
- Slide Locks (upper and lower)
- Output Module Slots
- Flow Expansion Slot
- Wire Ties for Strain Relief
- Earth Ground Lug
- Transformer Assembly
- Wiring Compartment Cover
- Spare Fuse Holders
- Wall Mount Bracket
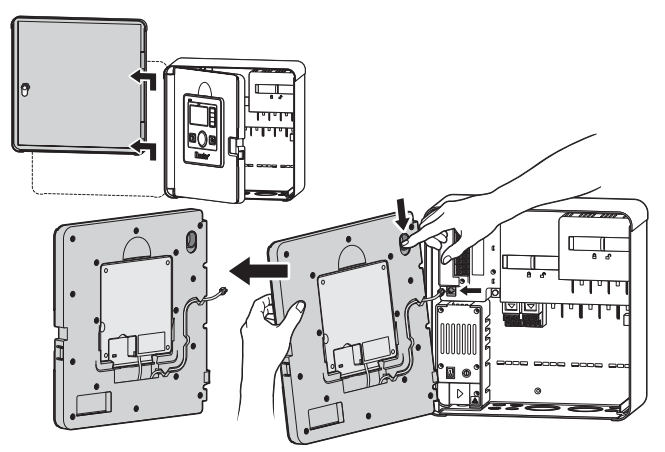
Removing Front Door and Face Frame
- Lift and remove the controller front door.
- Disconnect face pack cable.
- Press down on the release lever.
- Tilt-out face frame and remove.
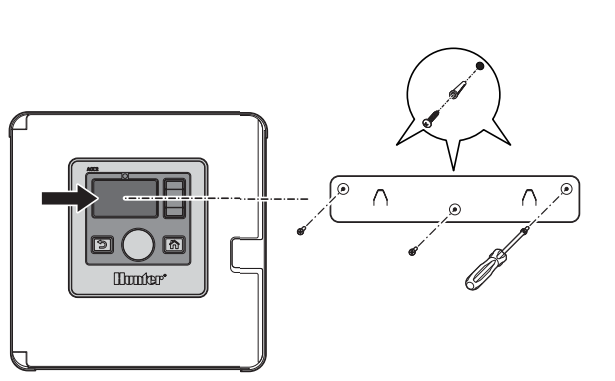
Wall Mounting
Metal pedestal mounting instructions are included with the pedestal hardware.
- The bottom of the wall bracket should be eye-level for the center of the controller display.
- The paper template is supplied for marking all anchor holes.
- Level, mark, and use a ⅛" drill bit for anchor holes. Do not forget the lower center hole in the controller cabinet.
- Secure wall bracket with supplied or equal hardware.
- Hang controller on a wall bracket with rear hooks.
- Secure lower center screw from inside the cabinet to complete mounting

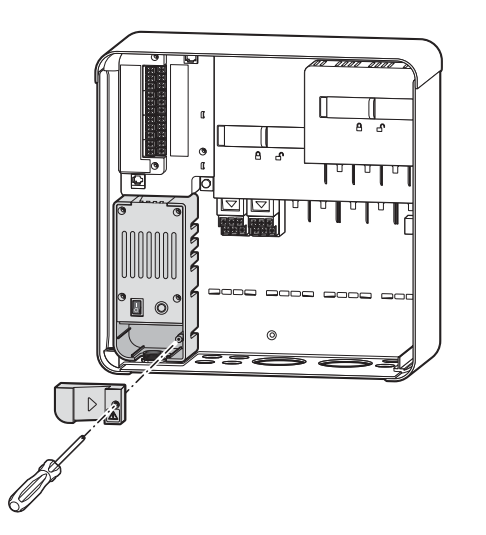
Wiring Controller Power
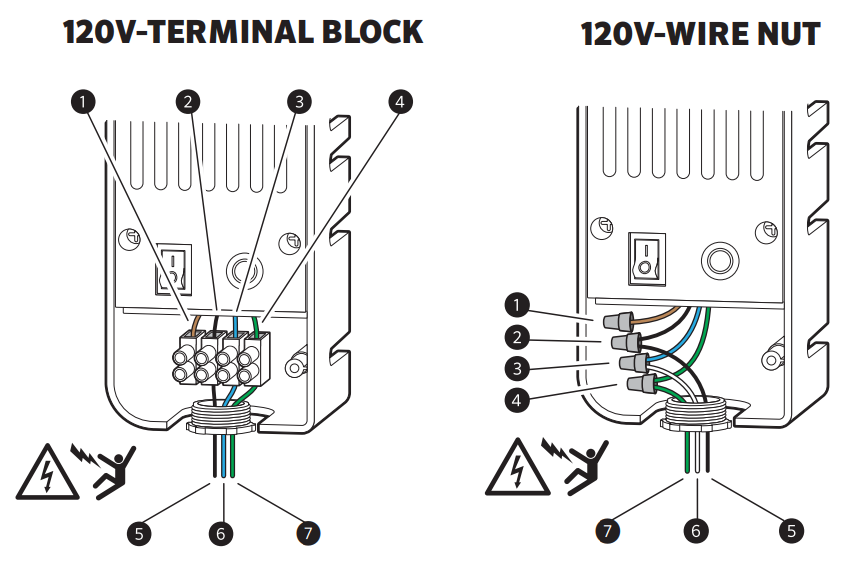
ACC2 may operate with either 120VAC or 230VAC power input. Connections should be made by a licensed electrician. Follow all applicable electrical codes.
- Remove the wiring compartment cover.
- Verify that AC power is off at the main circuit breaker.
- Route incoming AC power wires (minimum 14 AWG/2 mm2 ) through the approved conduit into the wiring compartment. Strip wire ends approximately 1/2”/ 12 mm.
- Make AC wiring connections using supplied terminal block or wire nuts and electrical tape, in accordance with local codes. 5. Always cap off or insulate the unused hot wire from the transformer.
Wiring Diagram

Conduit Sizes
| Model | 1/2" Power Input | 1/2" | 2" |
|---|---|---|---|
| ACC2 Metal | Qty. 1 | Qty. 6 | Qty. 2 |
| ACC2 Plastic | Qty. 1 | Qty. 6 | Qty. 2 |
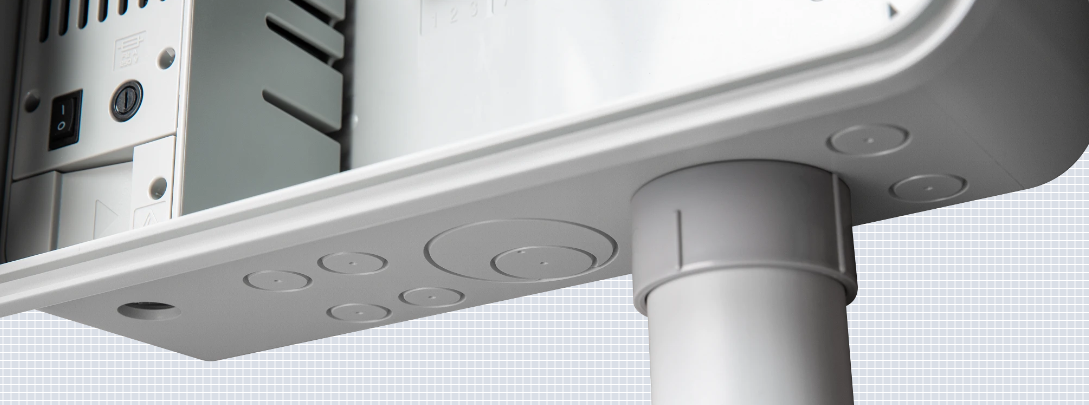
Note: The plastic model requires a step-down drill bit for template holes.
Hala yardıma ihtiyacın var mı? Buradayız.
Bize hangi konuda desteğe ihtiyacınız olduğunu söyleyin, biz de sizin için en iyi çözümü bulalım.

