IMPORTANT! Do NOT three-way splice PILOT-SGs or loop any two-wire paths. You will have intermittent or constant communication issues if your three-way splice PILOT-SGs or loop any two-wire paths.
A good surge protection system works by totally protecting the system from small to medium lightning storm effects, and by minimizing the effect of large lightning storms.
The minimum recommended level of protection is to have one decoder grounded at the end of each wire path and one decoder grounded every 1,000 ft/300 m or 12th decoder. For higher levels of protection, ground the decoders more frequently. There is no limit on the number of ground connections in an Integrated Hub system.
Both the controller and the two-way modules must be grounded to ground rods or plates with less than 10 Ohms resistance. The ground should always be measured with a ground resistance meter. A "clamp on meter" cannot be used for ground measurement since this is an isolated system. Ground resistance measurements should be performed with a "fall of potential" type meter in two-way module systems. The ground should be tested regularly for resistance.
Surge protection inside the two-way module can wear out, and a two-way module should be replaced when it might have been damaged by a lightning strike in the immediate vicinity. The two-way module is a complex electronic part, and it is not possible to fully test whether it is working. Replace the two-way module if there is any visible damage to the device, or if nearby two-way modules or controllers have been damaged.
All the PILOT station two-way modules have grounding attached to them. If using a PILOT two-way module that is a VIH with a solenoid connected to it, you will have to use a PILOT-SG Surge two-way module to perform proper grounding practices.
For new installations, it is recommended to have at least one Two-Way Module after the new Pilot-SG at the end of each run. This will allow the Pilot Control system to know if the Pilot-SG has experienced a surge, since it creates an open circuit on the rest of the path after the Pilot-SG. The user would be notified in Pilot CCS that there is a communication error to the stations on the rest of the path downstream from the Pilot-SG that experienced a surge. The stations upstream from the Pilot-SG would still be functioning normally.
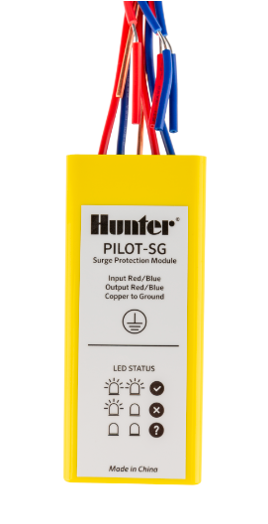
Surge arrestors are designed to be wired in series with the two-wire path and need to be properly grounded. See Pilot Integrated Hub System Design Guide for details on recommended ASIC grounding.
LED Status Indicators
The new Pilot-SG with LEDs gives a visual indication of the state of the surge arrestor and the condition of the two-wire path without opening any splices.
(LED locations indicated by blue arrows in the picture)
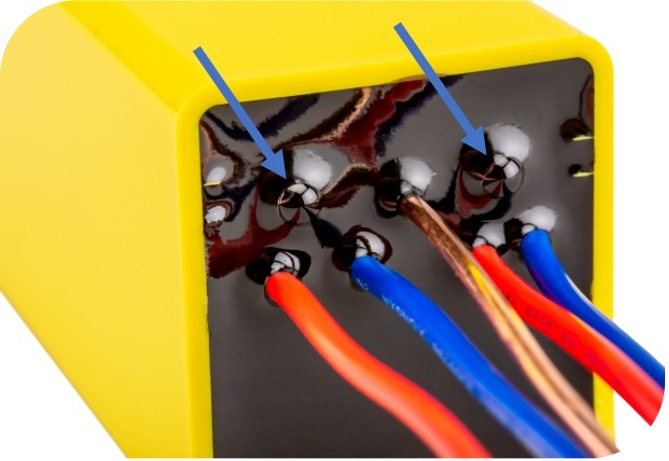

2 Lights alternately flashing = Power to and from the Pilot-SG so the surge module is functioning normally.

1 Light flashing = Power is going to the Pilot-SG but a surge caused the circuit to be open on the rest of the path after the Pilot-SG. The Pilot-SG with LEDs should be replaced.

No Lights flashing = No power is going to the Pilot-SG. The wire path and connections should be inspected to troubleshoot the problem.
PILOT-SG Installation
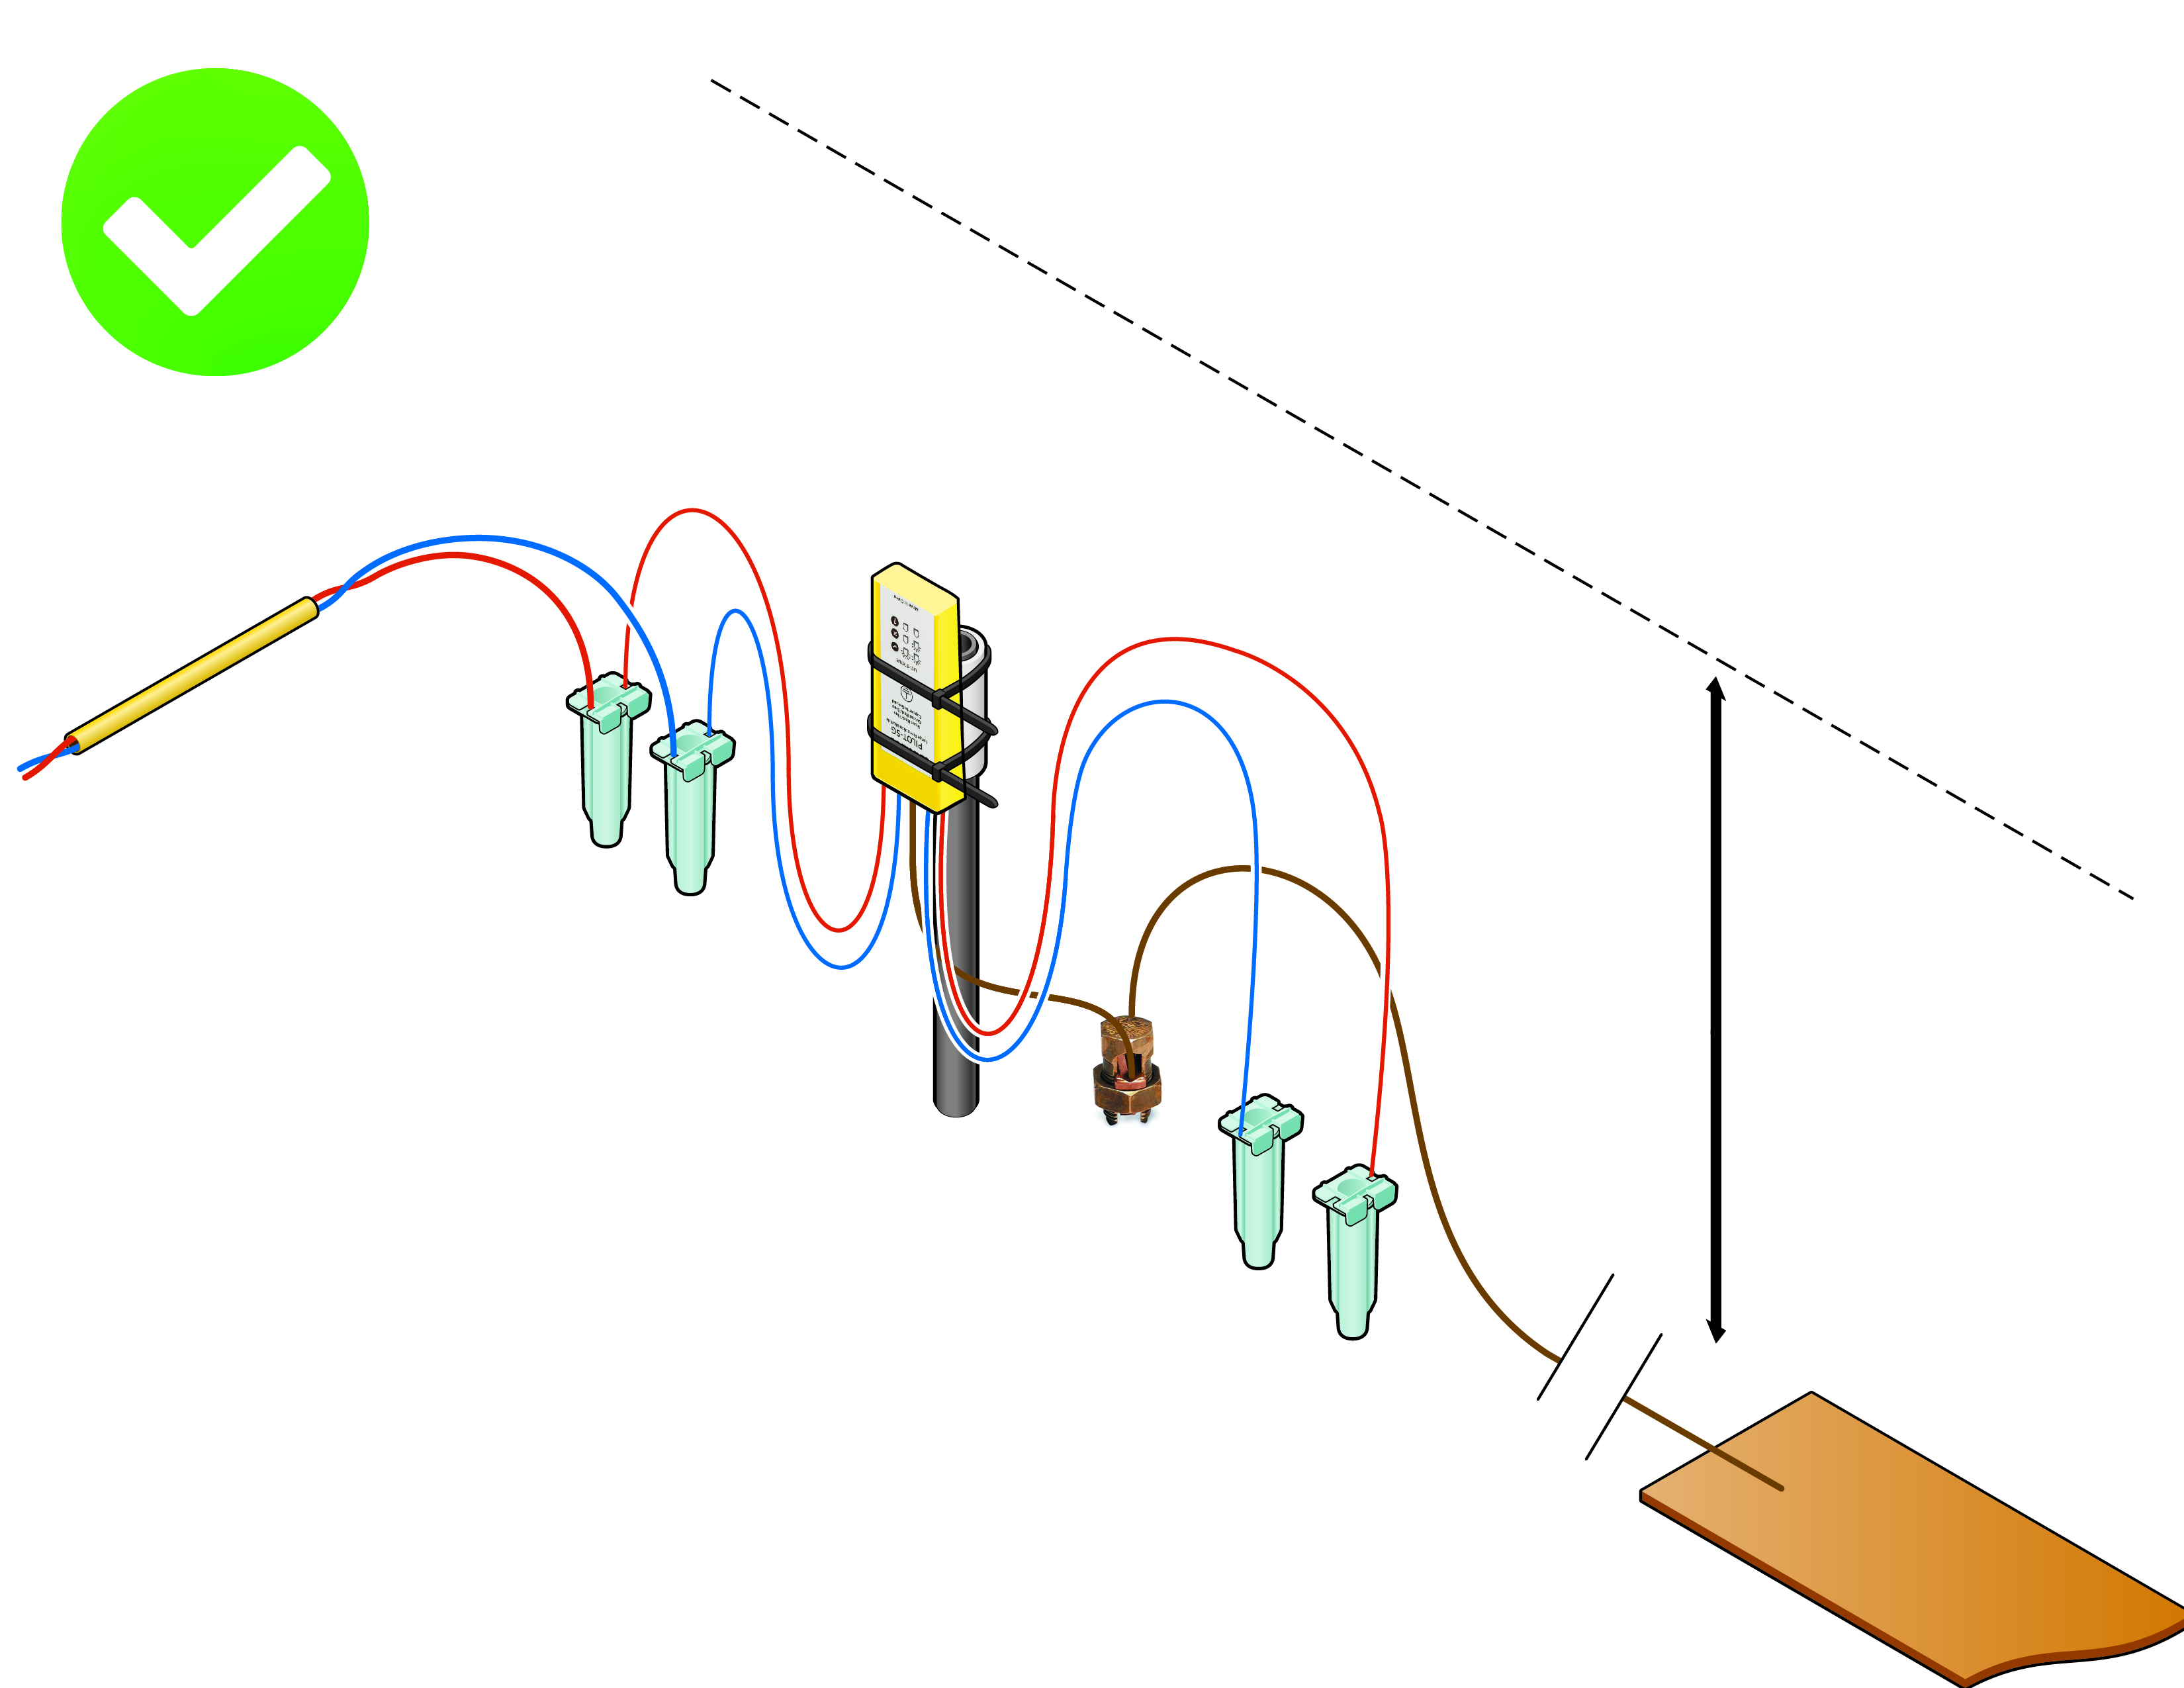
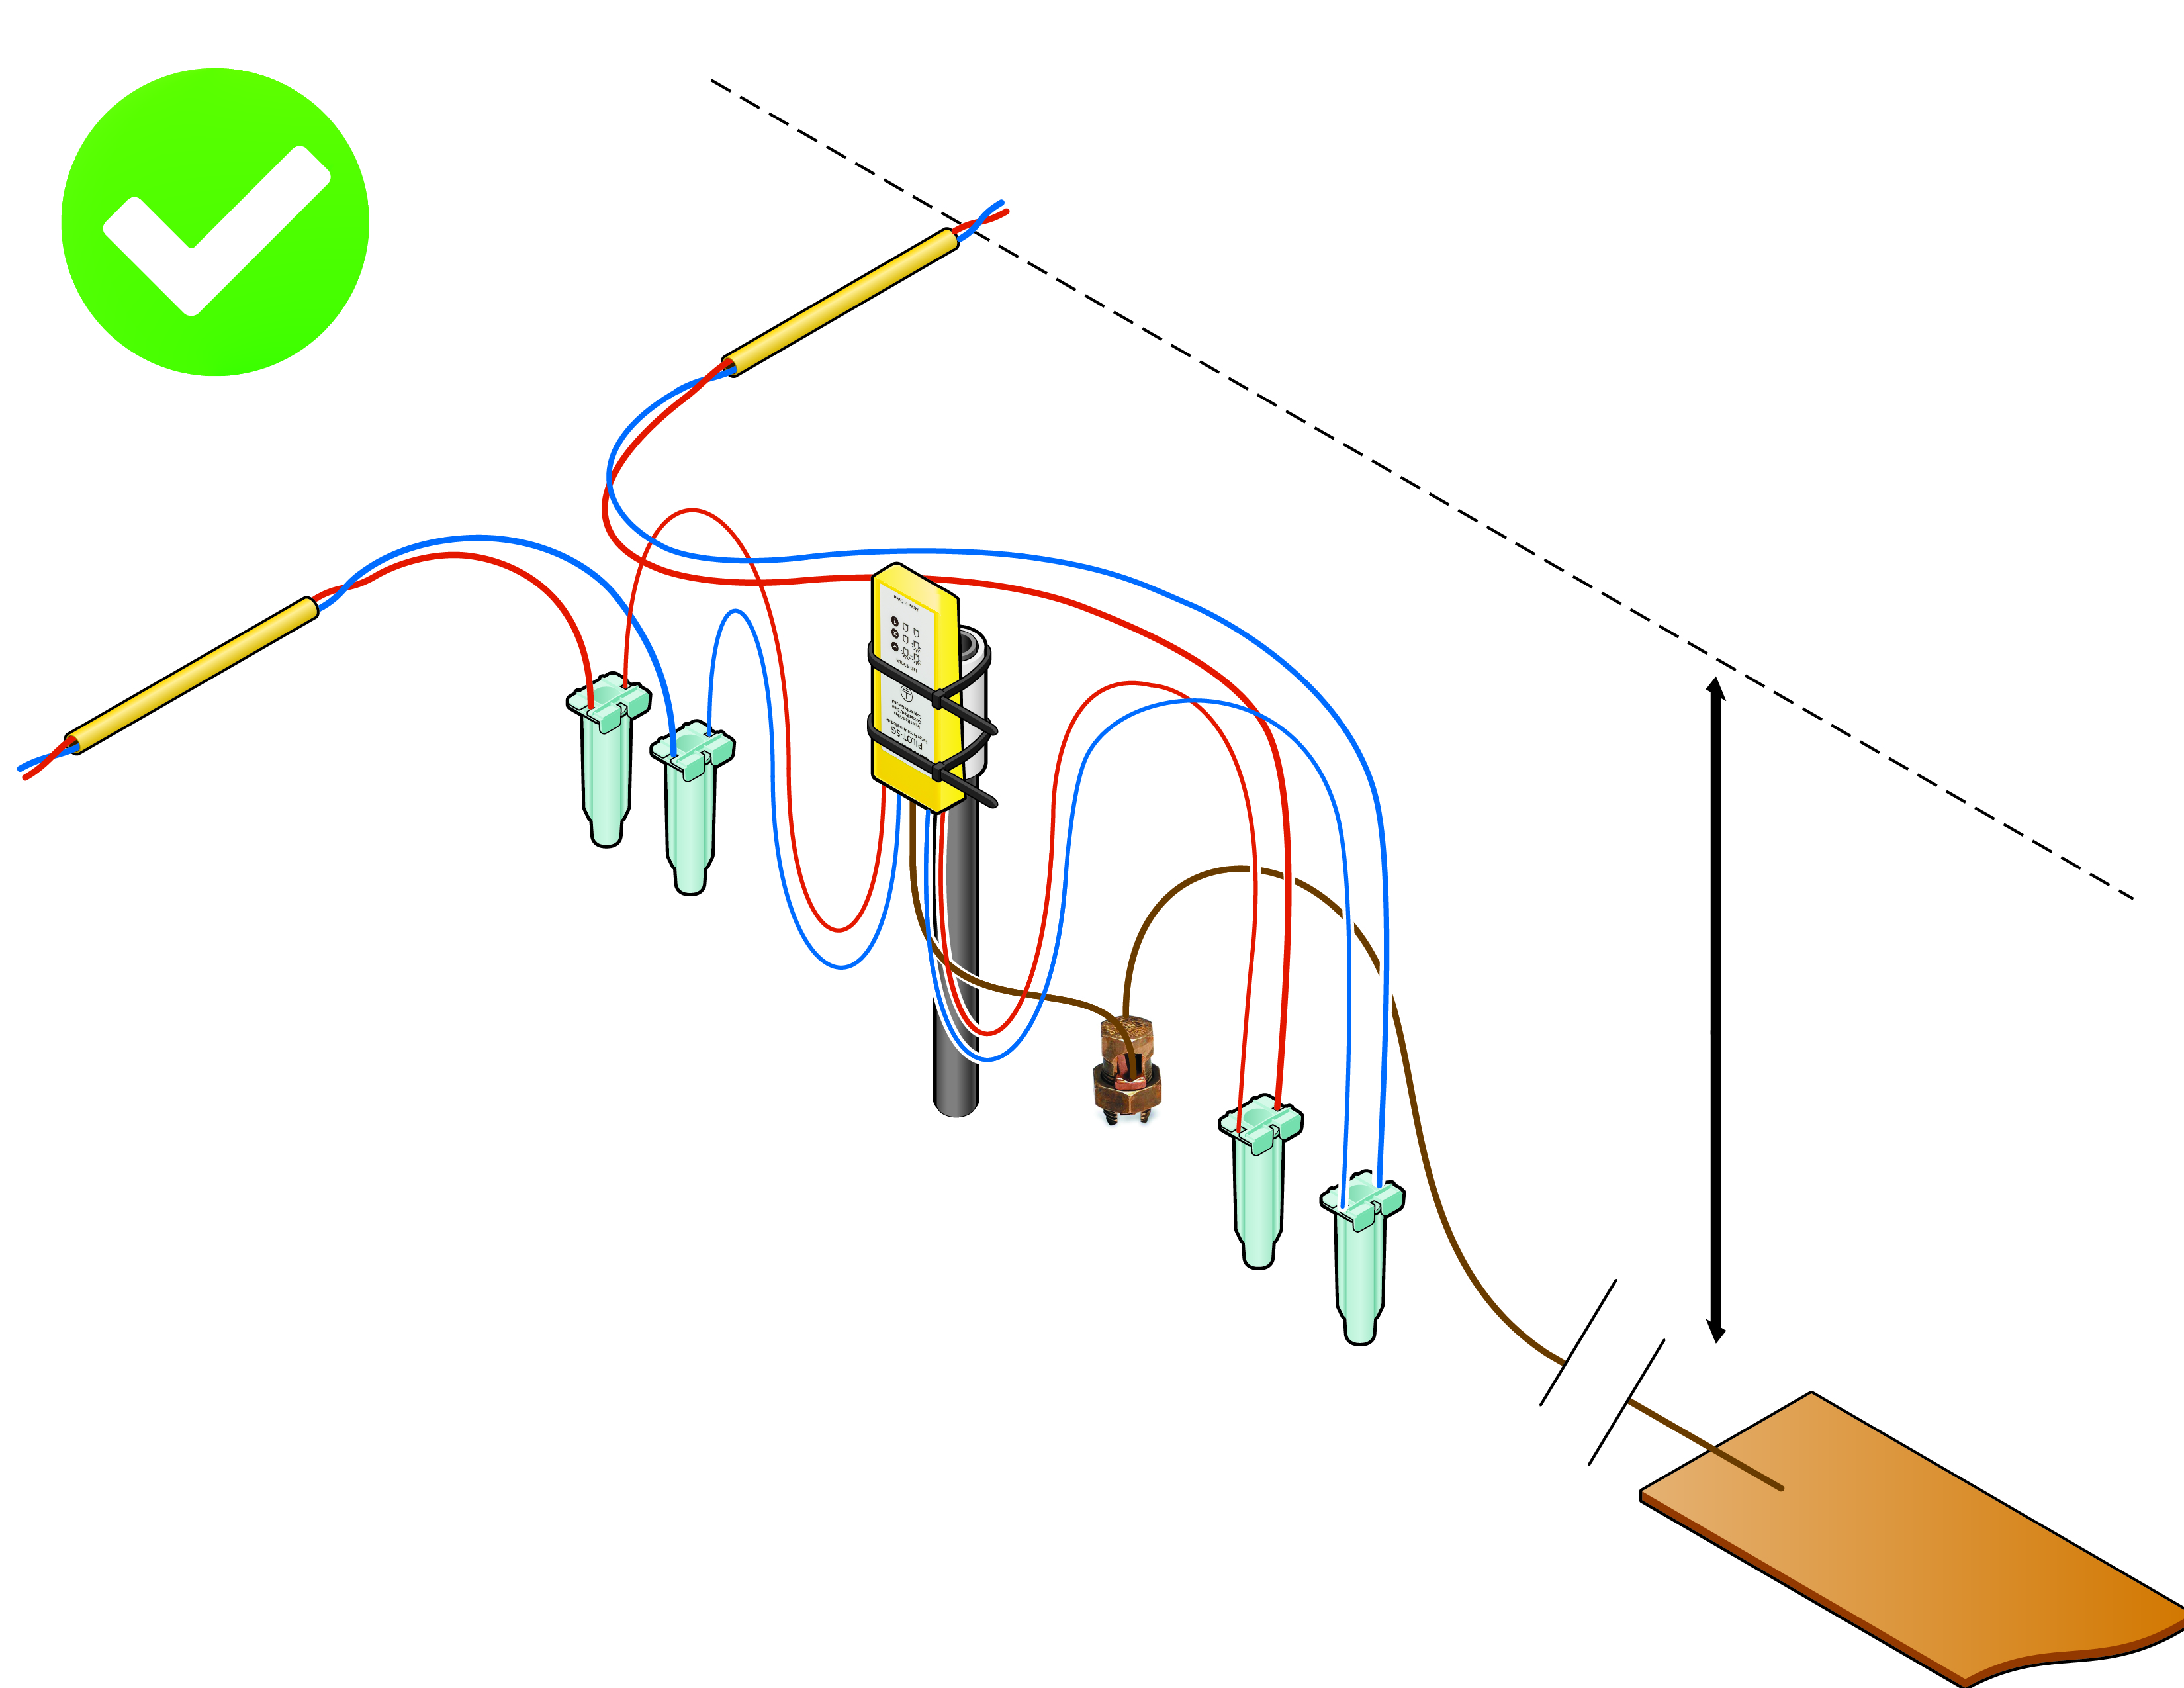
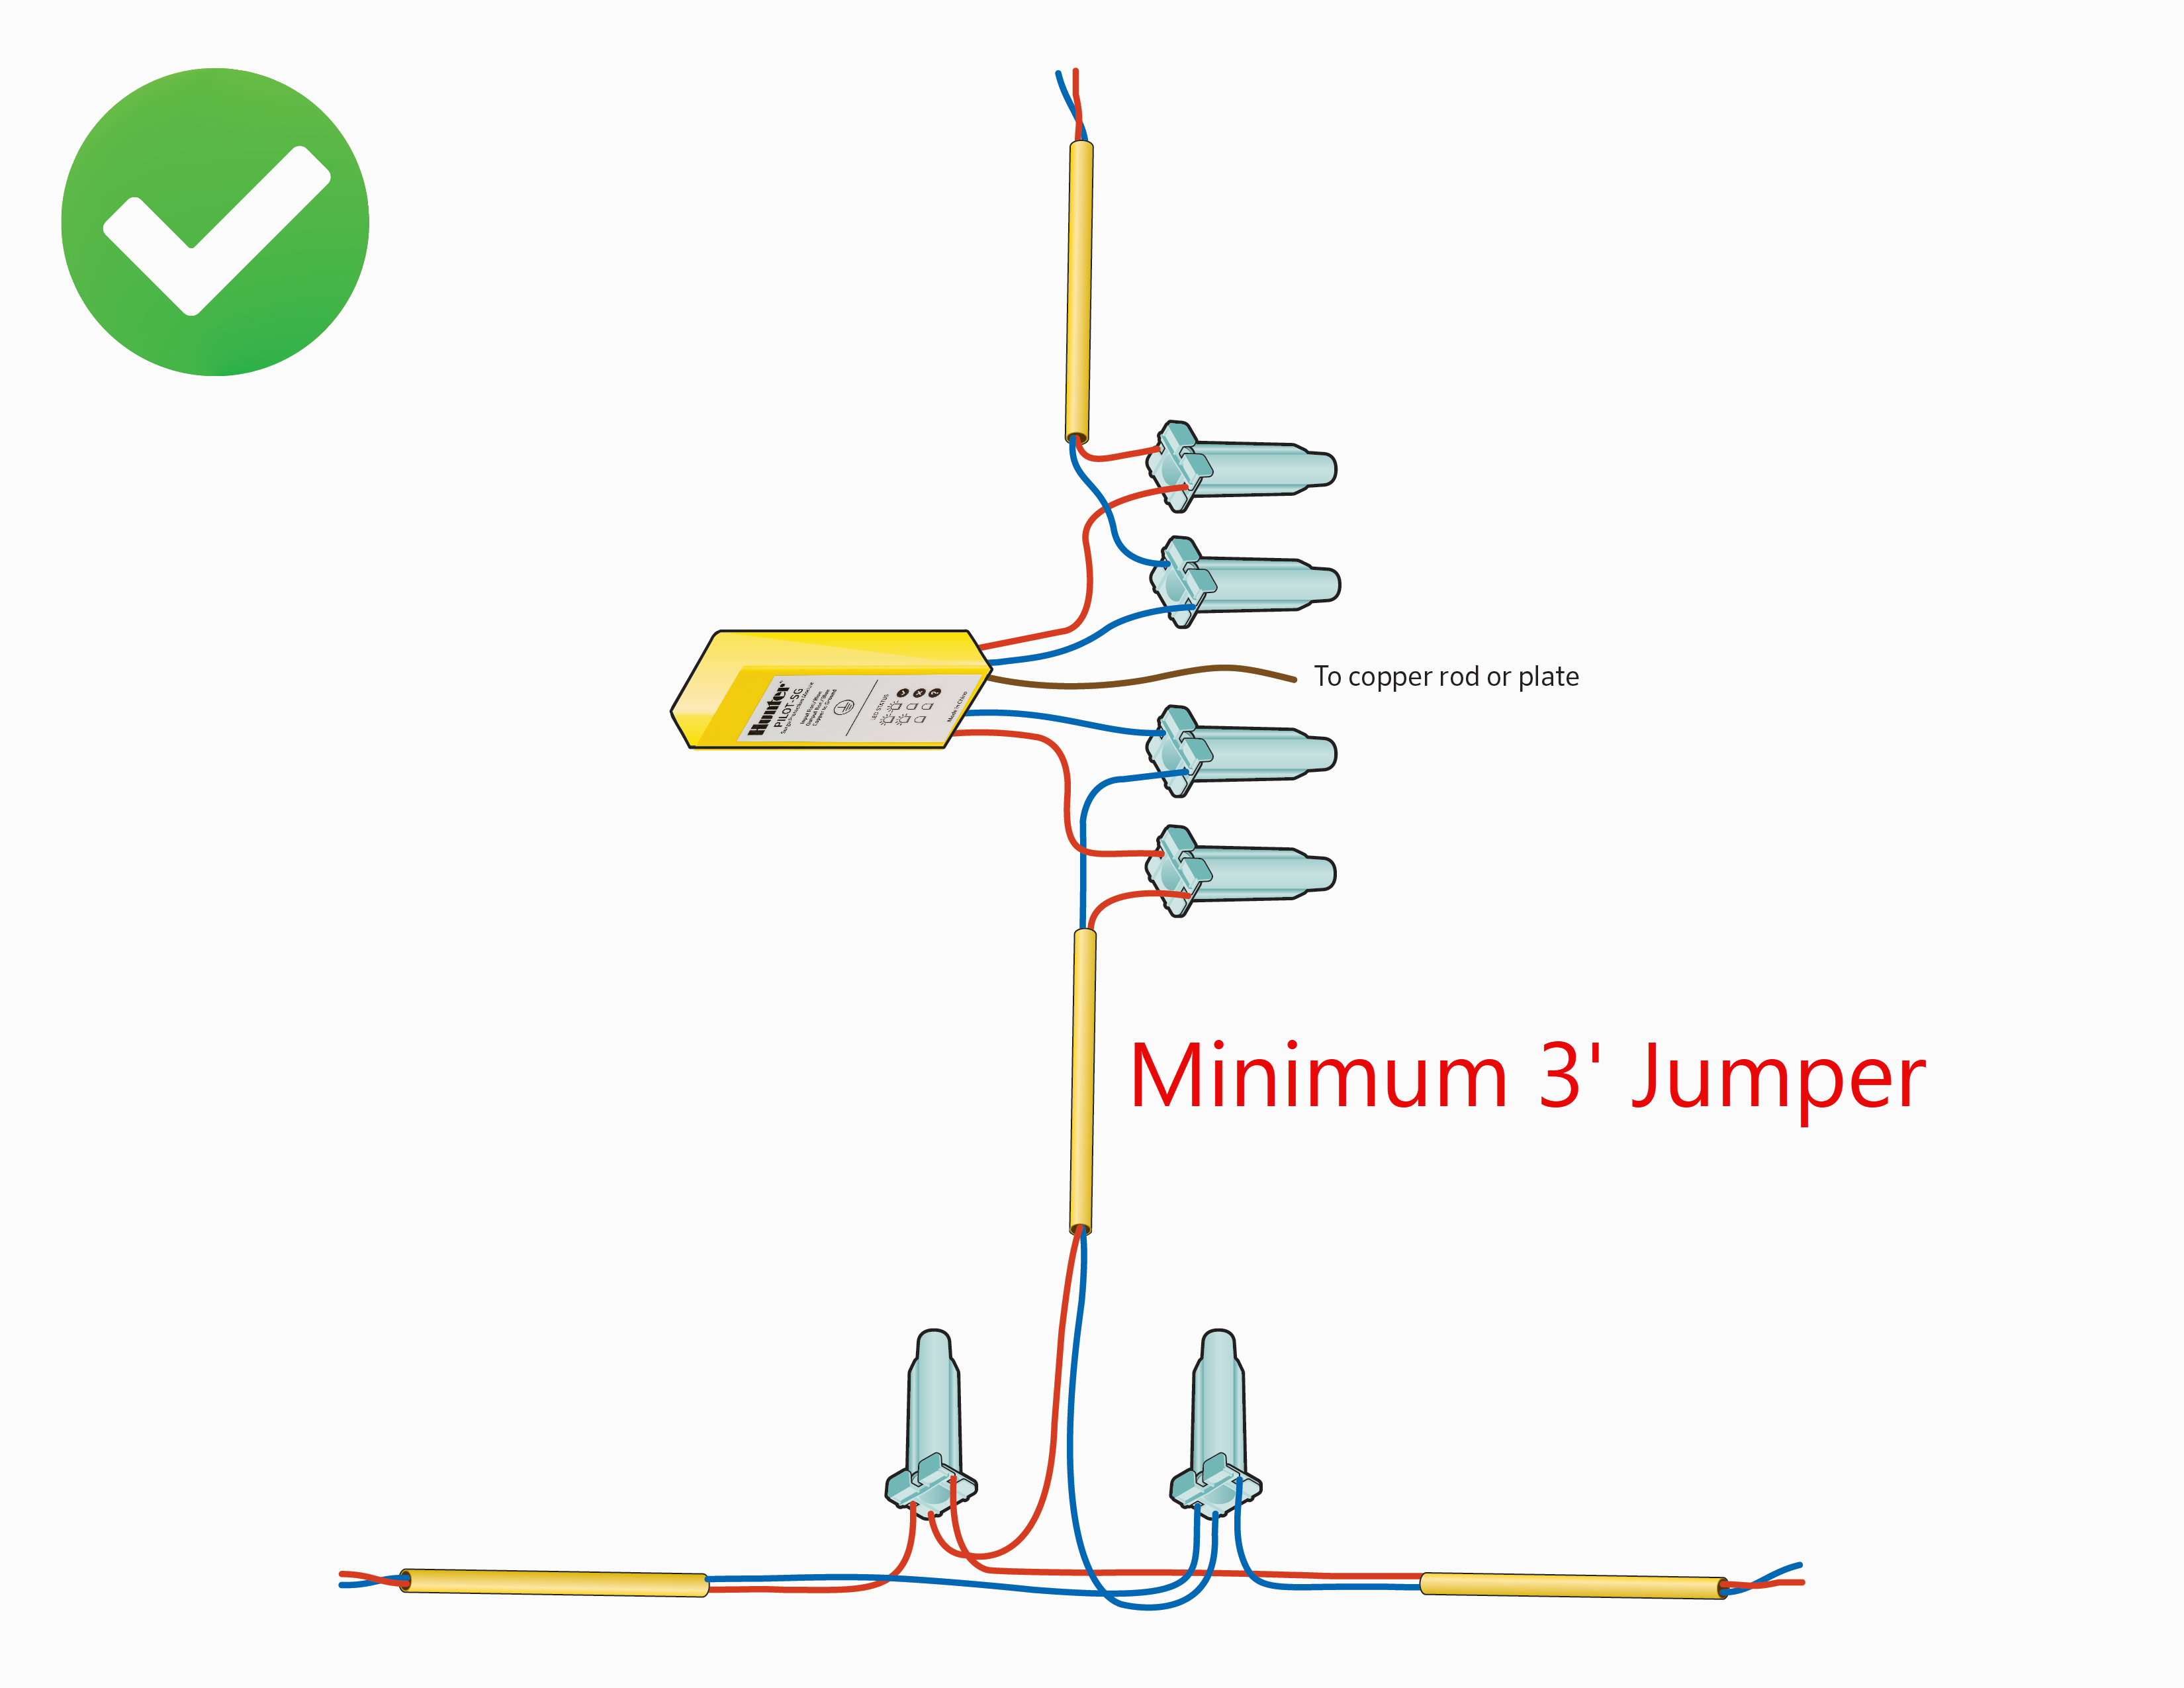
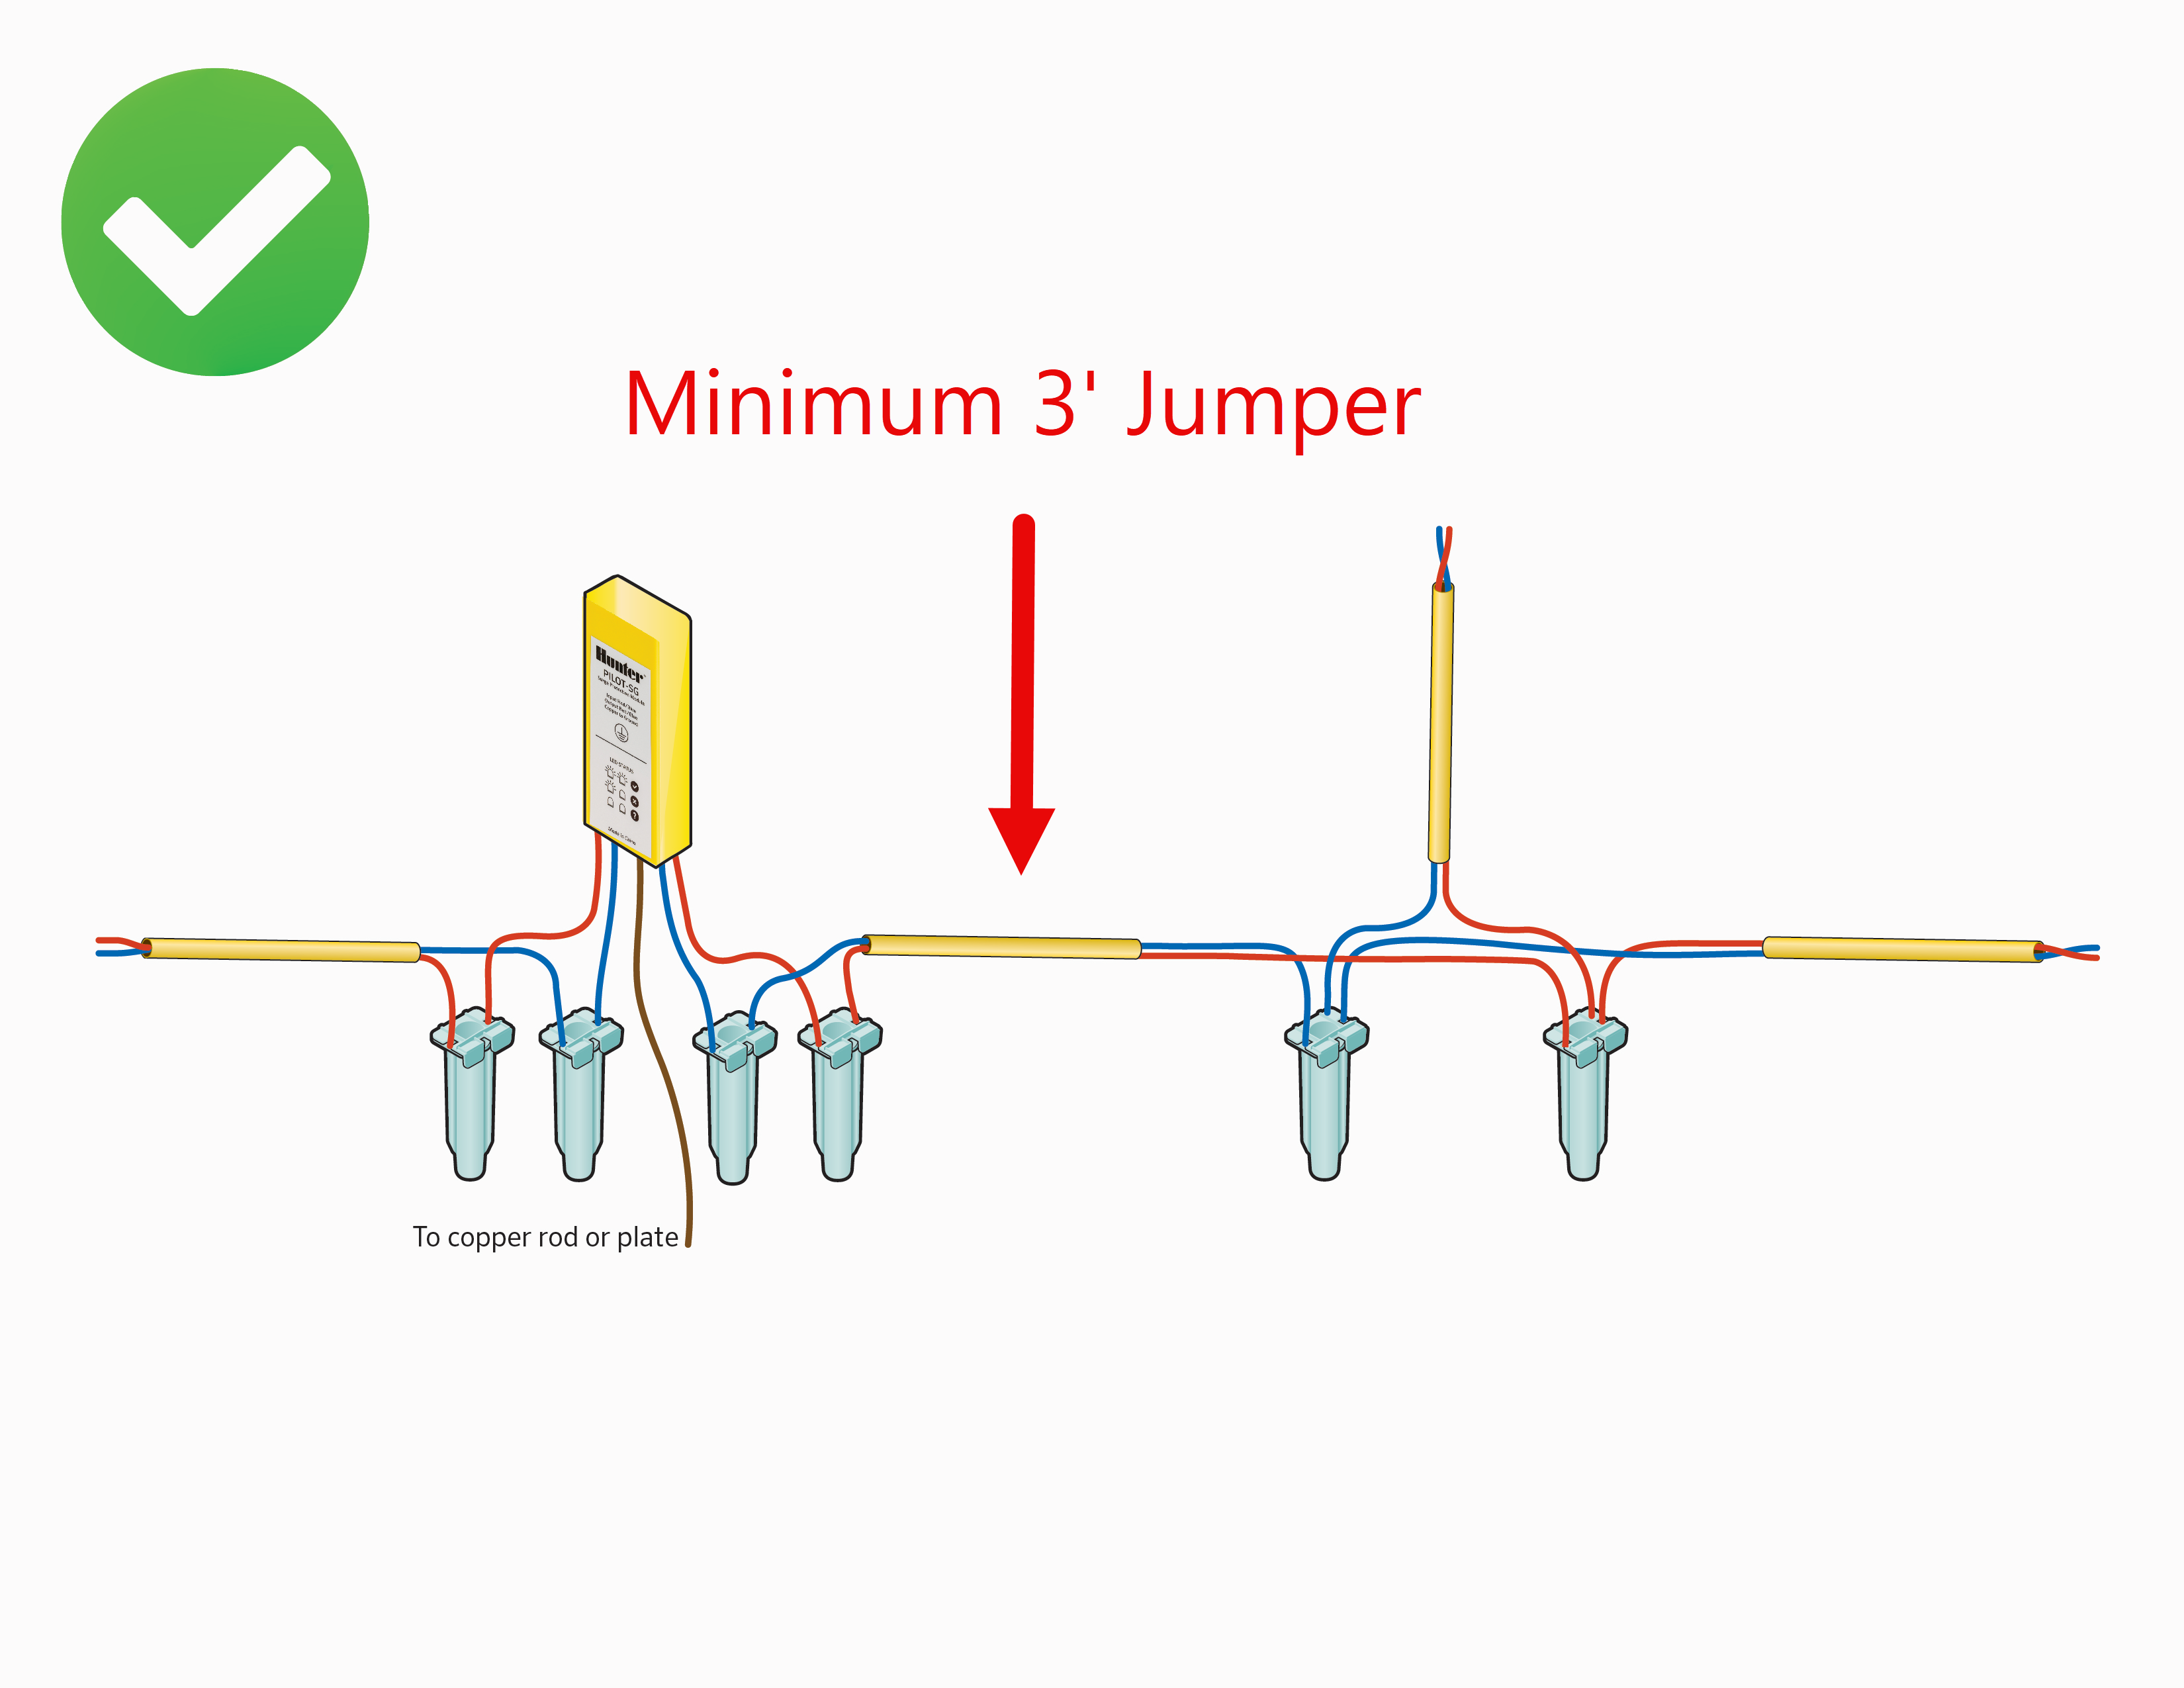
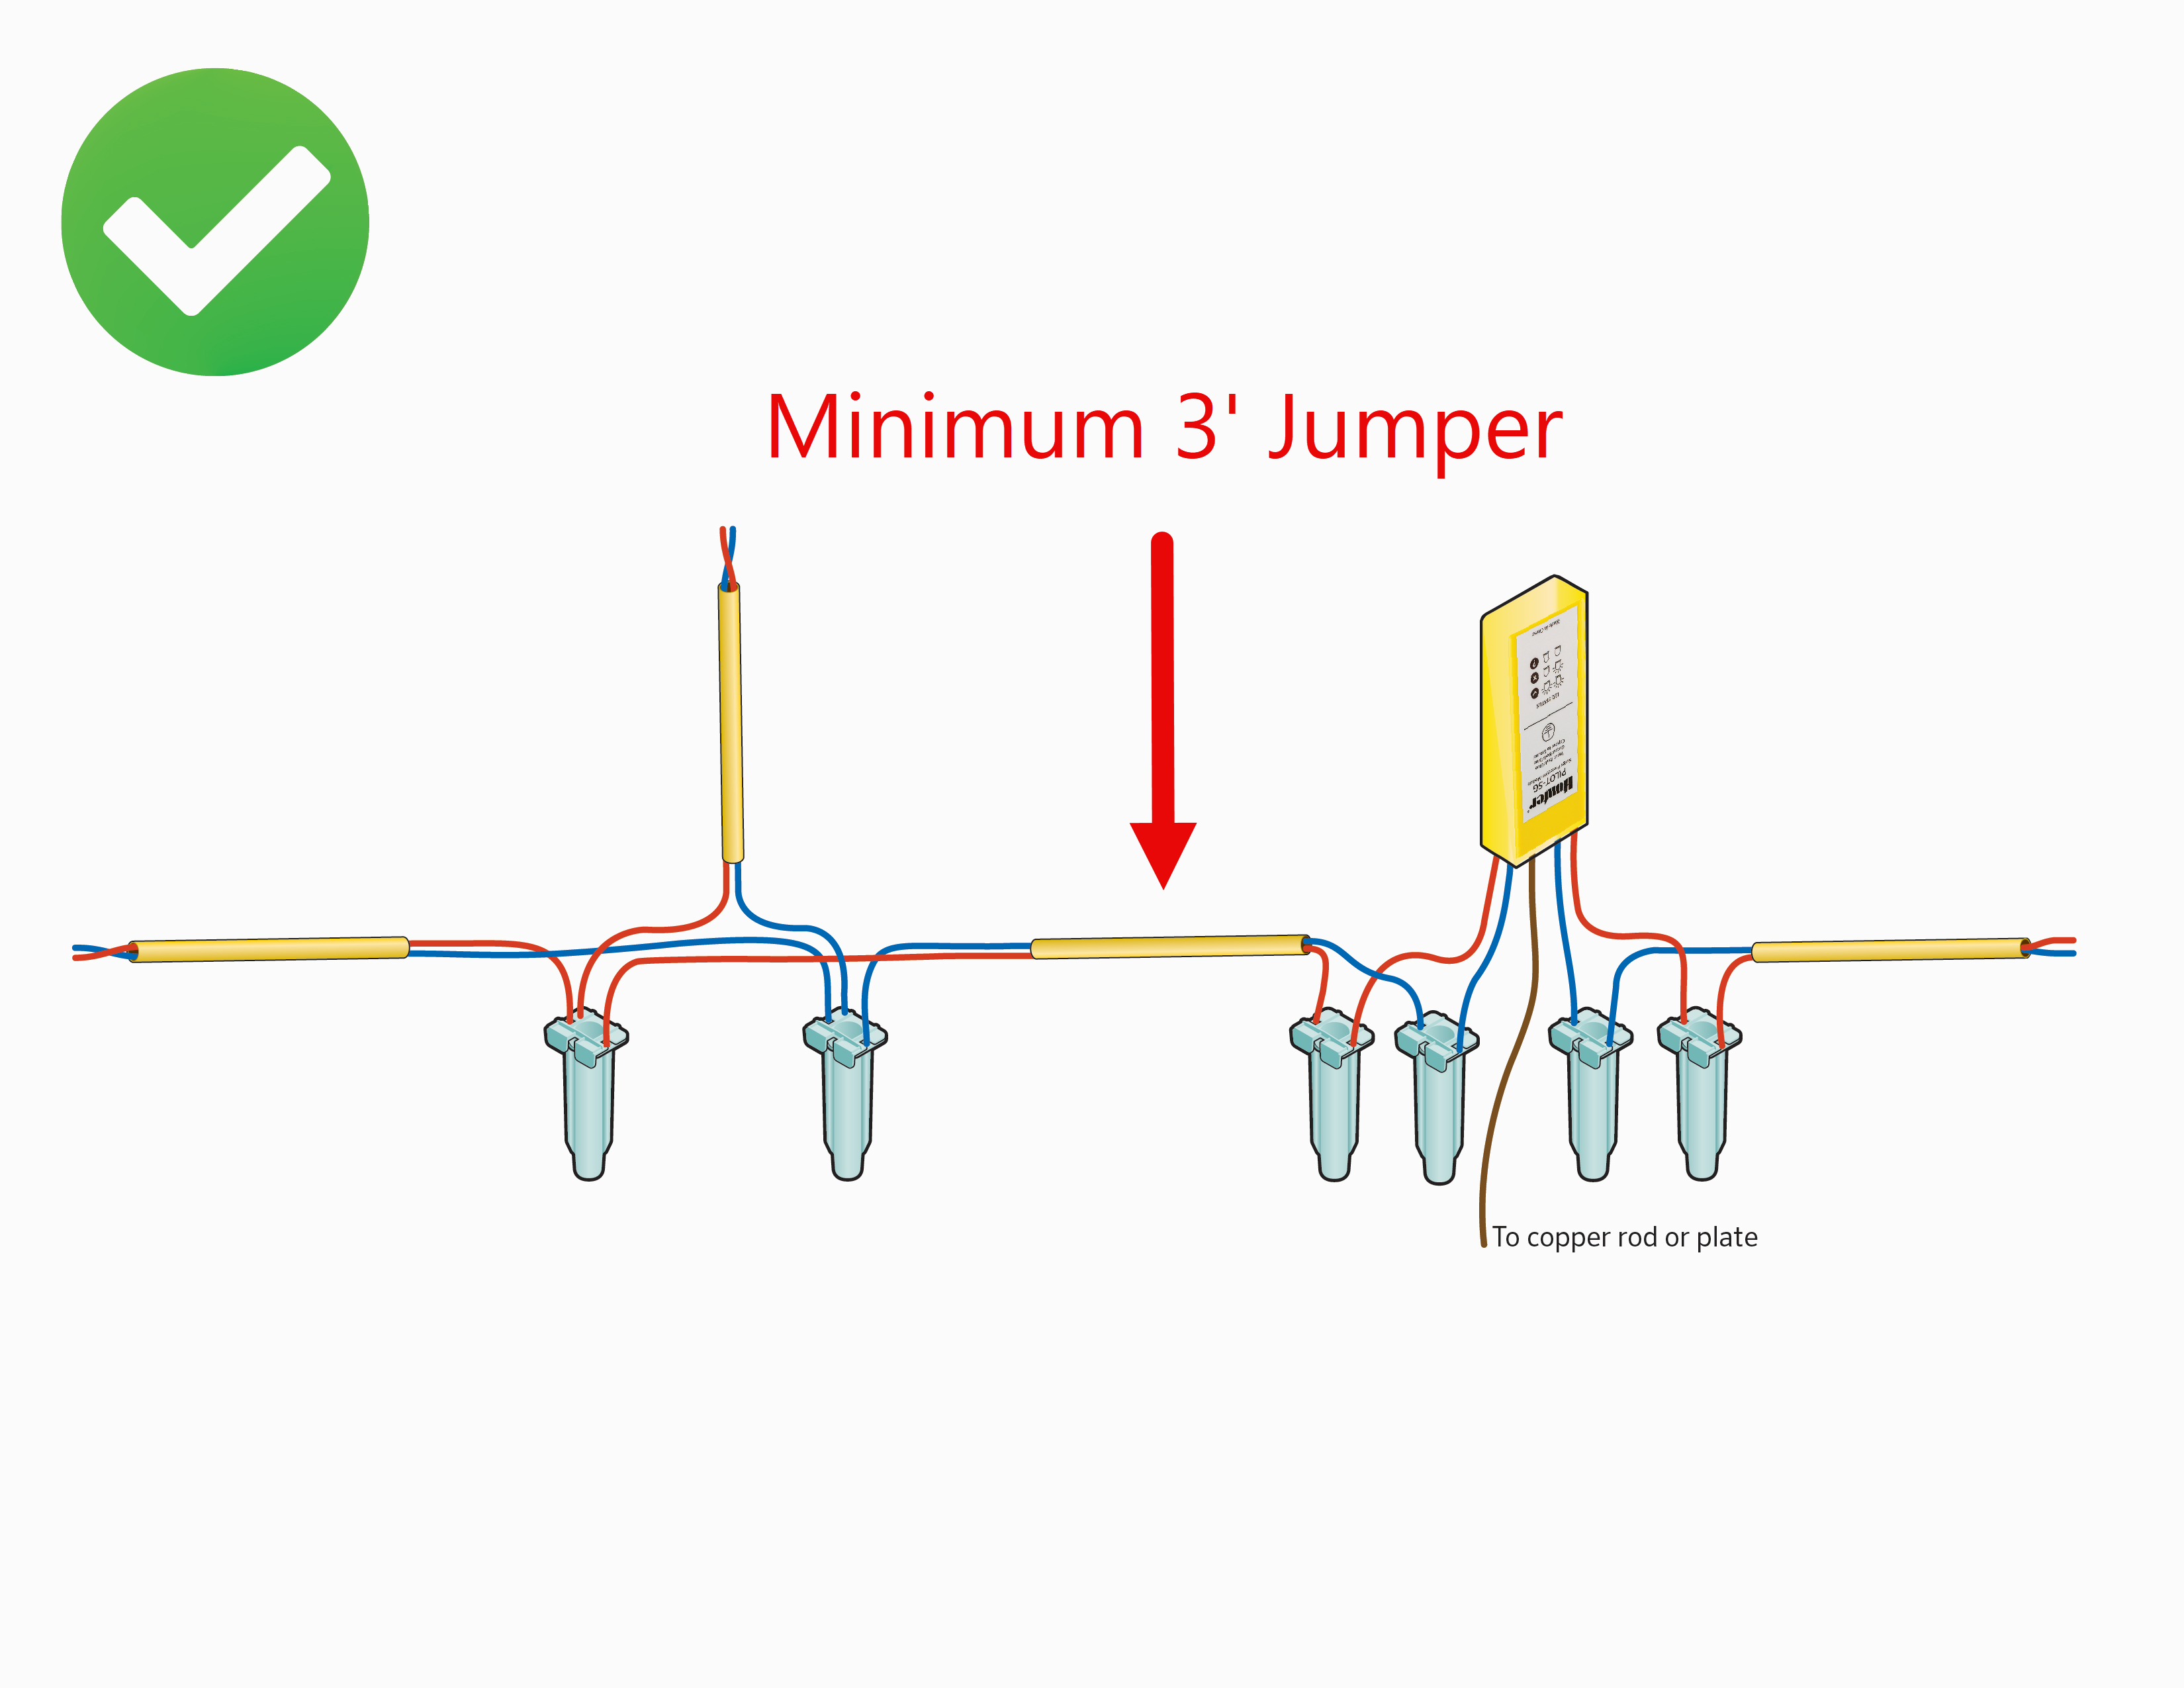
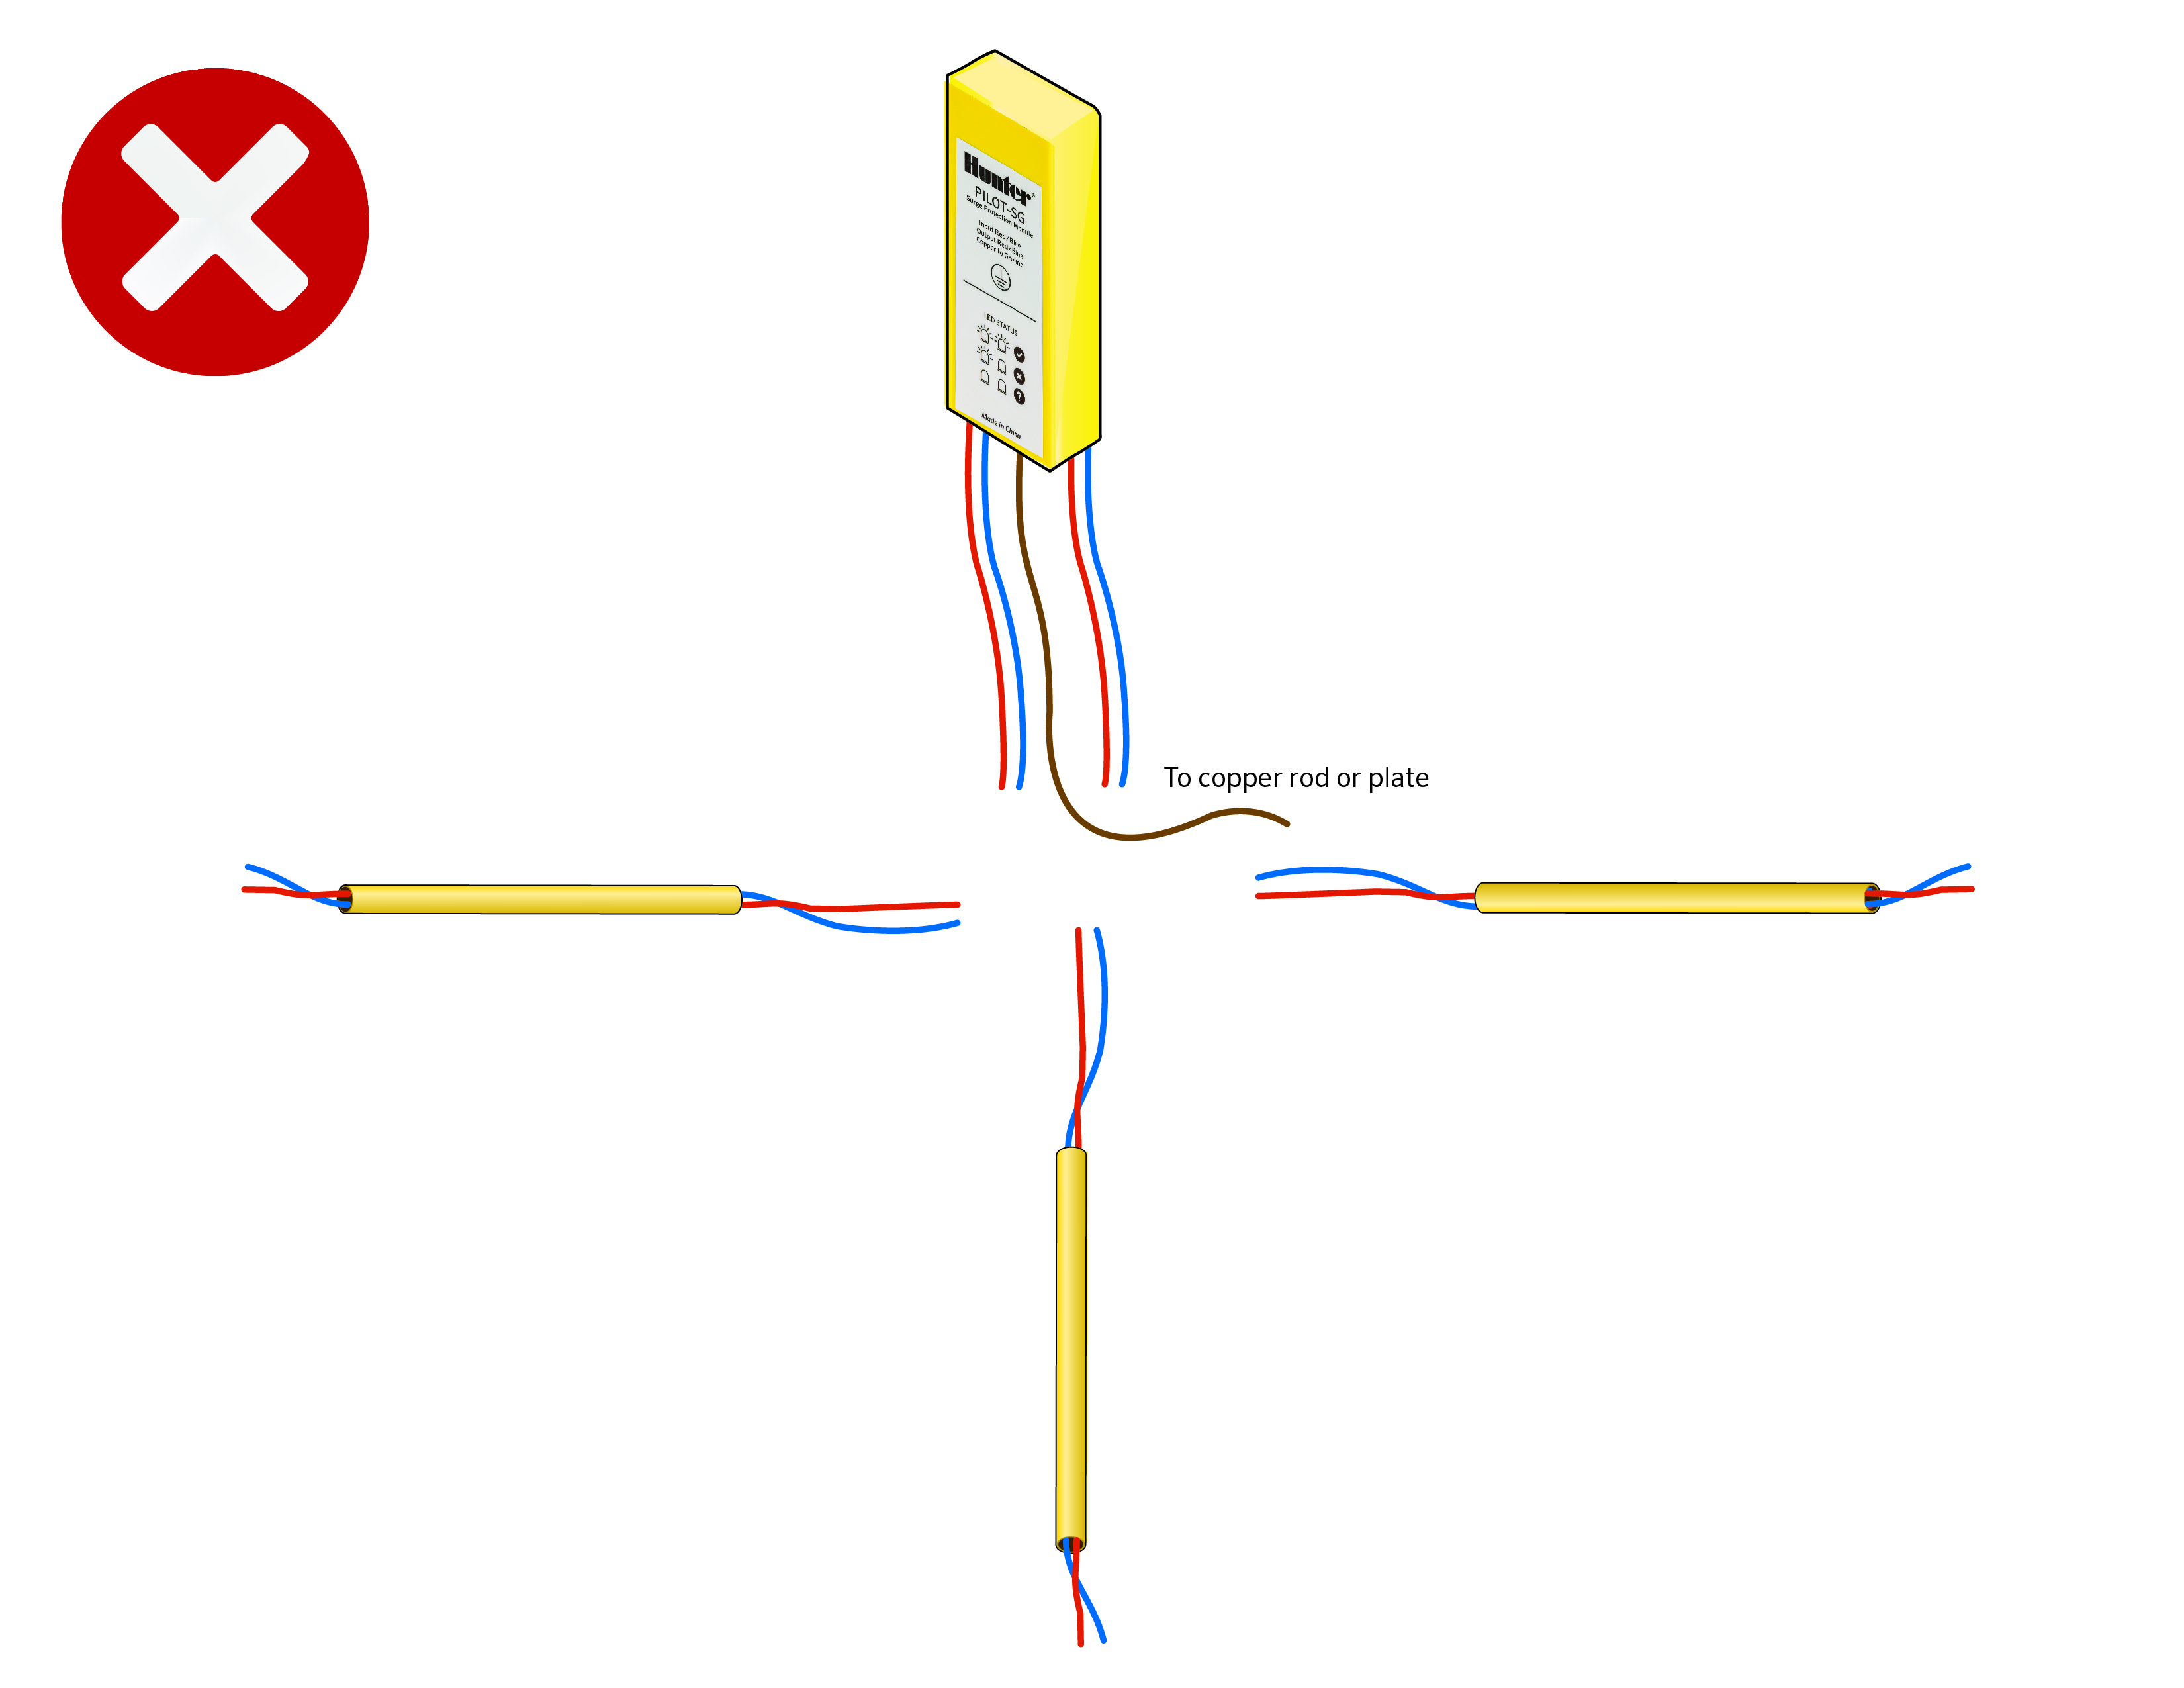
Earth Grounding: It is the responsibility of the person in charge of the irrigation system to ground all electrical equipment installed in the irrigation control system. Grounding components will include, but not be limited to, the items described in the following paragraphs. Use grounding electrodes that are UL-listed or manufactured to meet the minimum requirements of the US National Electrical Code (NEC).
Grounding Two-Way Modules: At the very minimum, the grounding circuit for a two-way module will include a copper ground plate and may also include 50 pounds/22 kg of earth contact material, as defined below and per the following details.
The copper grounding plate assemblies must meet the minimum requirements of section 250 of the NEC. They are to be made of a copper alloy intended for grounding applications and will have minimum dimensions of 4" x 36" x 0.0625" (100 mm x 1.2 m x 1.58 mm). A 10-foot/3 m continuous length (no splices allowed unless using exothermic welding process) of 10 AWG/5 mm2 solid bare copper wire is to be attached to the plate using an approved welding process. This wire is to be connected to the two-way module’s ground wire and 10 AWG/5 mm2 bare copper "shielding wire" as shown in the wiring details. A 50-pound/22 kg bag of earth contact material must be spread so that it surrounds the copper plate evenly along its length within a 6"/15 cm wide trench per detail below. Salts, fertilizers, and other chemicals are not to be used to improve soil conductivity because these materials are corrosive and will cause the copper conductors and electrodes to erode and become less effective with time.
Install all grounding circuit components in straight lines. When it is necessary to make bends, do not make sharp turns. To prevent the electrode-discharged energy from re-entering the underground cables, all electrodes shall be installed 6 to 8 feet/2 to 2.5 m away from said cables, and at right angles to the two-wire path. If more than one electrode is used to achieve lower resistance, the spacing between any two electrodes shall be 15 to 20 feet/4.5 to 6 m, so that they don’t compete for the same soil.
The earth-to-ground resistance of this circuit is to be no more than 10 ohms. If the resistance is more than 10 ohms, then additional ground plates and earth contact material are to be installed in the direction of an irrigated area. It is required that the soil surrounding copper electrodes be always kept at a minimum moisture level of 15% by dedicating an irrigation station at each controller location.
Ti serve ancora aiuto? Siamo qui per te.
Dicci di cosa hai bisogno e troveremo la soluzione migliore per te.

