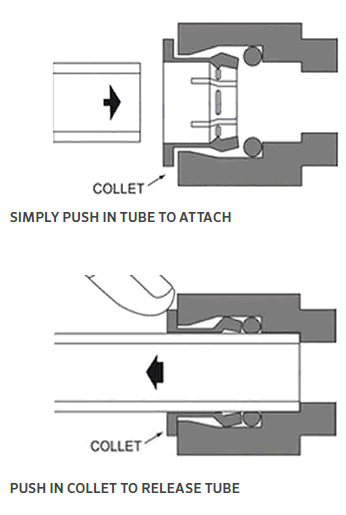
After installing the on-off-auto selector switch, insert the supply tubing from the switch into the control valve. This allows you to turn the valve on and off, either manually from the switch or automatically from the controller. On the control valve, you’ll find two fittings. One fitting is on the inlet side of the valve, and the other is in the center of the valve. Each fitting comes from the factory with a black protective dirt plug. To remove the plug, press downward on the collet ring at the top of the fitting while pulling the plug upward and out of the fitting.
To connect the tubing to the fitting, simply press the tube into the fitting until it stops. Pull gently outward to confirm the tube is locked into the fitting. Perform these two steps while making sure to match the blue color-coded tube to the blue color-coded fitting, and the red color-coded tube to the red color-coded fitting.

Still need help? We're here.
Tell us what you need support with and we'll find the best solution for you.

