Removal
- Locate the opposing tabs on the snap ring in the base of the body with pliers
- Remove the snap ring by squeezing it together with inlet valve pliers (P/N 475600SP) to clear it from the snap ring groove. Then pull up and out.
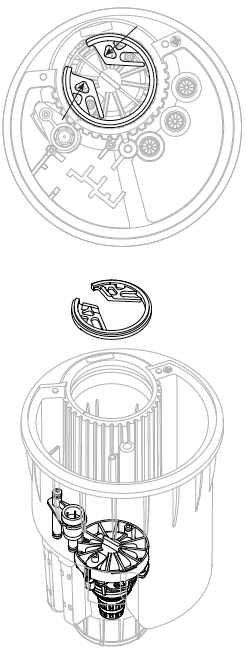
- Remove the serviceable inlet valve with the inlet valve tool (P/N 604000SP) or grab the tab in the center of the inlet valve with pliers (P/N 475600SP) and pull up.
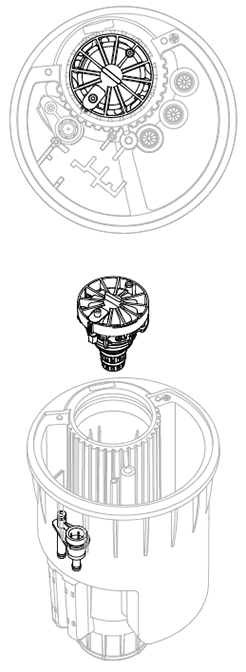
Installation
IMPORTANT: Do not use excess force to install the inlet valve into position. It is a key component and can only be installed in one direction.
Line up the slit from the inlet valve and the rib on the inside of the rotor body. There is a dimple on the top of the rotor to identify the specific rib needed for alignment.
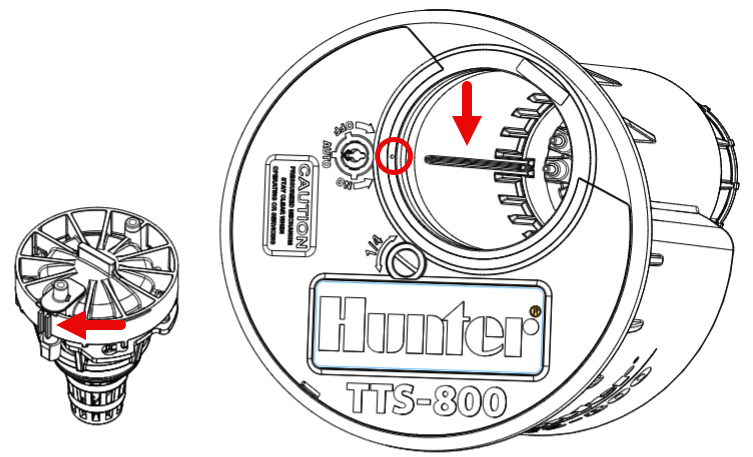
- Using the inlet valve tool (P/N 604000SP), or grab the tab in the center of the inlet valve with pliers (P/N 475600SP) and slide the inlet valve through the rib.
- Once lowered press the inlet valve into position. The communication port from the inlet valve should be pressed into the metal communication port at the bottom of the inside of the rotor body. If the inlet valve slit is lined up with the rib this can be pressed in with gentle force to make the connection with both communication ports.
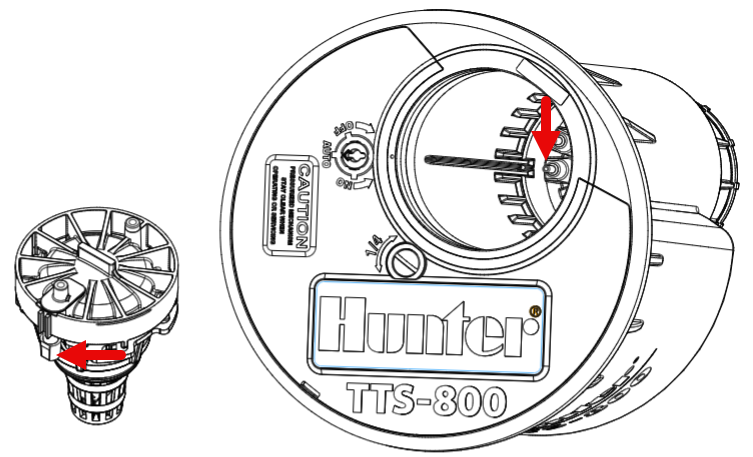
- With the inlet valve pliers (P/N 475600SP) squeeze the opposing tabs on the snap ring and lower the snap ring into the snap ring groove above the inlet valve. Pay attention to the snap ring alignment slots as they must fit through the protruding bosses on top of the inlet valve.
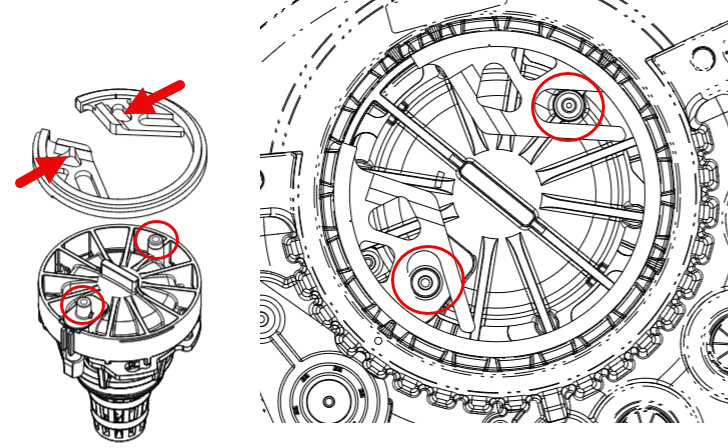
- When the snap ring is aligned press it into the snap ring groove gently. Listen for a click or witness it move into the grooved position to complete the inlet valve installation.
Still need help? We're here.
Tell us what you need support with and we'll find the best solution for you.

