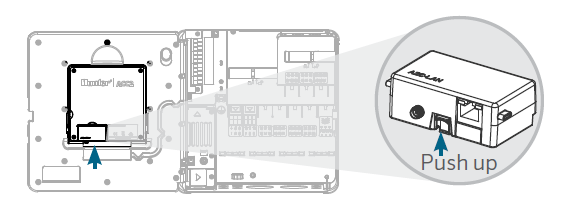
1. Turn OFF the controller power.
2. Tilt the facepack. Then remove the facepack from the larger panel to access the bottom area of the facepack.
3. Remove cover (or prior module) from the controller facepack. Press the spring-loaded button and pull downward to remove.
4. Slide the new A2C-LAN module in until the lock clicks.

NOTE: A2C-LAN uses Ethernet port 8883 for external communications. This information is not required for less complicated installations, but may be required in commercial networks.
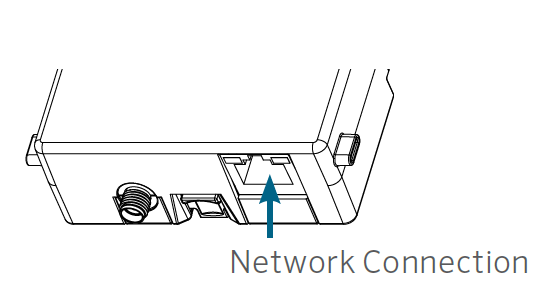
1. Insert the network cable into the enclosure. Route the cable through the cable channel on the back of the facepack.
2. Connect the network jack (RJ-45 or 8P8C) into the receiver on the A2C-LAN module. Route the LAN cable through the cable channel on the back of the facepack. Leave enough slack in the network cable to allow the door to open and close without pinching the cable.

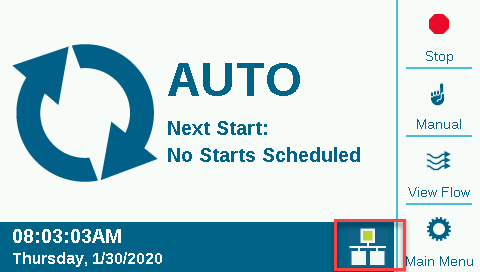
3. Turn ON the controller power. After the controller reboots, the GREEN STATUS ICON


1. From the MAIN MENU icon in the CENTRALUS software, select ADD CONTROLLER.

2. Follow the on-screen instructions to add your controller. After entering the required information (controller name, serial number, location, etc.), the software will send a CONTROLLER VERIFICATION CODE for security purposes.

3. On the controller, press the MAIN MENU button and turn the dial to the SETTINGS menu. Push the dial to select. Rotate dial down to CONTROLLER VERIFICATION and push dial to select.


4. In the software setup screen, enter the code number that appears in the Controller Verification screen. If the CODE is correct, the controller will be added to the software and the map. If the CODE is incorrect there willl be an ERROR message dispayed.
6. The networking icon on the HOME SCREEN of the controller should now have a GREEN status icon.
Still need help? We're here.
Tell us what you need support with and we'll find the best solution for you.

