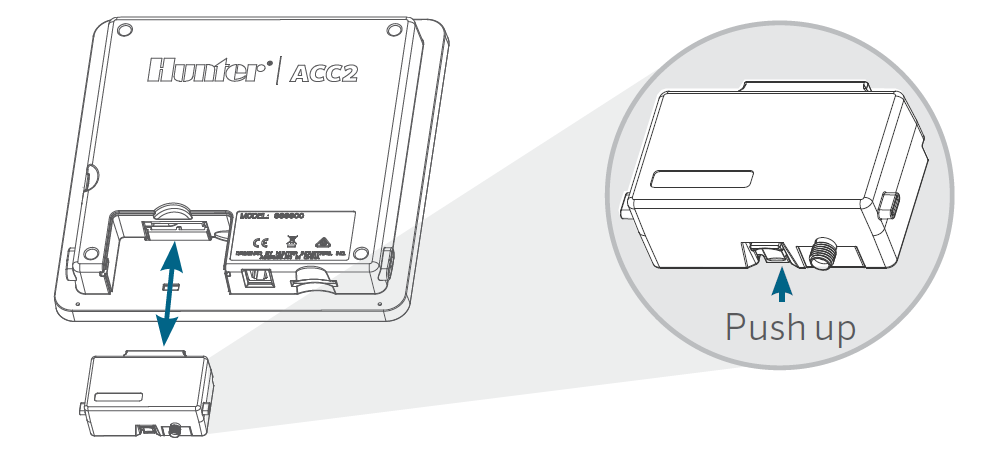
- Turn off the controller power.
- Tilt and remove the facepack to access the bottom of the facepack.
- Remove the dust cover or prior module from the controller facepack. Press the spring-loaded button and pull downward to remove.
- Insert the new A2C-WIFI module until the lock clicks.

Use the steps below for cable installation.
Screw the included antenna’s connector to the threaded, gold-colored antenna connection. Hand-tighten only.

Route the antenna cable through the cable channel on the back of the facepack.

Install the plastic antenna holder in one of the unused conduit holes on the bottom of the controller. The antenna must be mounted outside of the metal enclosures with the included housing. Secure the antenna holder with the included plastic nut. Leave enough slack in the antenna cable to allow the door to open and close without getting pinched.

Turn on the controller power. After the controller reboots, the networking icon should appear on the bottom of the Home screen. The status icon will remain red until the module is connected in the software.

Still need help? We're here.
Tell us what you need support with and we'll find the best solution for you.

